
How to plan a Bikepacking trip as a Woman (without forgetting anything)
I went on my first bike trip with some very cheap secondhand fabric panniers, an old, heavy mountain bike, and camping gear I’d had in the storage room since I was a teenager.
I struggled a lot on the hills because everything weighed more than a sumo wrestler, but the experience of the trip was so incredible, so enjoyable, that I haven’t wanted to travel any other way than by bike since.
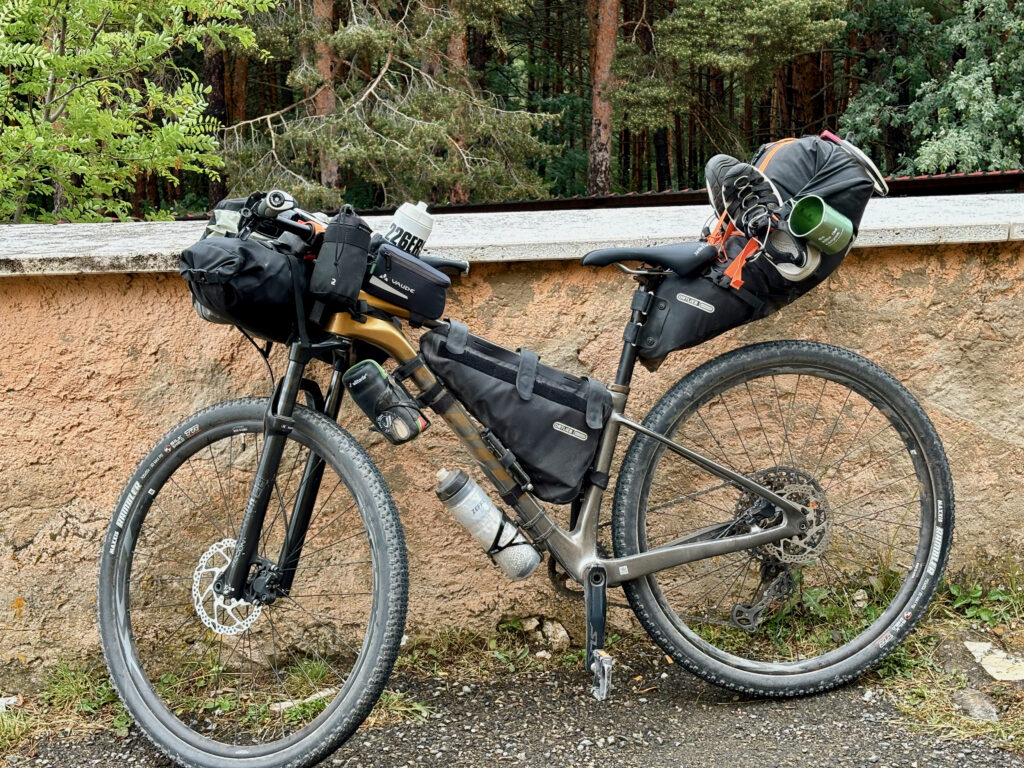
Now I have lightweight, technical gear that I’ve acquired over the years. I prefer to travel with just the essentials and use bikepacking gear instead of panniers, and even so, I sleep very well with my camping gear, I can cook delicious, nutritious, hot meals, and I have everything I need to feel comfortable both on the bike and when I get off it.
If you’re thinking about starting to travel by bike, you don’t need to spend a lot of money on gear before setting off: use what you already have, borrow, or look for secondhand options. And if you enjoy the experience, then consider getting whatever you might need.
This is the first article in a series on gear for bikepacking. Here, I’ve tried to put together a guide to equipment, safety tips, and hygiene recommendations for multi-day trips for women. In the following articles, I’ll go into each section in more depth, with examples of gear ranging from the most basic and affordable to the most technical and expensive.
Camping
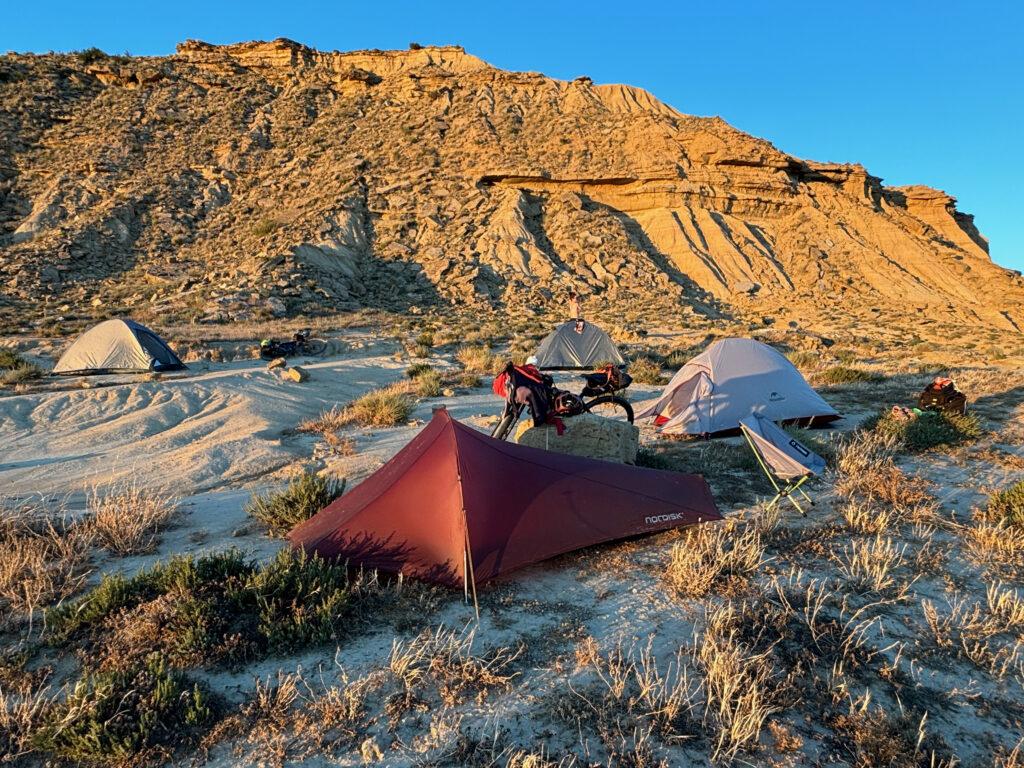
The items that usually take up the most space and weight in backpacks or saddlebags are camping gear. Common options for sleeping include: a lightweight tent (which protects against bugs and rain), a tarp, a hammock, or a bivy sack (very lightweight, ideal for minimalists).
Add to this a sleeping bag suited to the temperature, a sleeping pad with a good R-value (the measure of insulation), and, optionally, a pillow (you can also use your clothes in a bag).
Choosing a sleeping bag and pad is often tricky; you have to consider temperature, weight, space… and, on top of that, there are thousands to choose from, with prices ranging from €10 to €900. We’ll dedicate a whole blog post just to this topic.
In any case, my recommendation is not to skimp too much on this: getting a good night’s rest is essential for enjoying your days on the bike. Sleeping poorly because of the cold, dampness, or discomfort can ruin even the best of trips. Think about how much you’d pay for a hotel bed and how many times you’ll be camping. And if you’ve never camped before, it might be a good idea to try out some borrowed gear before buying anything, just in case you discover that sleeping in a sleeping bag isn’t for you.
On top of all that, I always travel with a folding chair. Being able to sit with my back supported and be comfortable while I cook or have a beer watching the sunset is one of the greatest pleasures of a bike trip. There are extremely lightweight chairs out there, and it’s definitely worth bringing one along.
Food and water
Cycling burns a lot of calories, and if you’re on a long trip, eating pre-packaged or cold food every day isn’t a good option, nor is blowing your budget at restaurants.
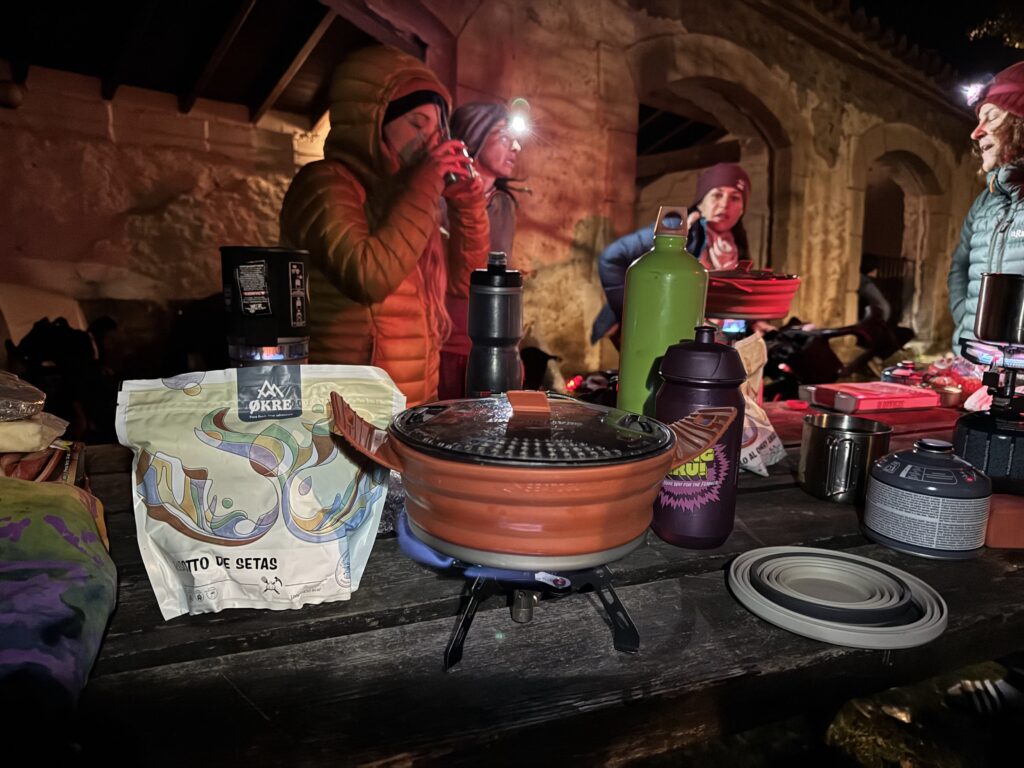
There are very lightweight stoves available at very affordable prices, with different fuel options (gas, alcohol, or gasoline). Find out what’s available in the areas you’ll be traveling through to decide which one to choose.
For cooking, you can bring a pot that holds between 0.7 and 1.5 liters and store the rest of your kit inside it: cup, bowl, spork, lighter… If you’re a keen cook, you can add a frying pan and a plate. There are foldable pots and pans, and some very affordable, reasonably lightweight options. We’ll also post a blog entry to discuss cooking gear.
And, of course, don’t forget a pocket knife and a lighter.
For water, in addition to the water bottles for the route, it’s highly recommended to bring collapsible water bags to fill up at the end of the day so you have water for cooking or washing. A water filter or purification tablets, if you’re going to an area with rivers, are also a great option.
Clothing
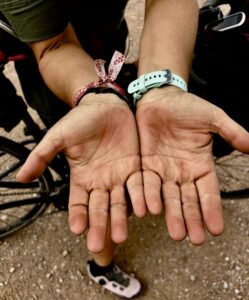
First, what you wear while riding. For me, the ideal is to bring two of each item—one to wear and one as a spare: cycling shorts or pants (short or long depending on the weather), a T-shirt or merino wool jersey (it breathes better and smells less), socks (also merino wool in winter and cool in summer), a rain jacket and/or windbreaker, thermal shirt and jacket (if it’s very cold), buff, shoes, helmet, glasses (preferably photochromic, because even if it’s not sunny, you’ll need them to protect yourself from the wind and bugs), and gloves (essential if you don’t want blisters on your hands—look at how mine turned out after a trip where I lost my gloves).
On the other hand, what you wear when you get off the bike. In this case, I usually bring just one of each item, unless the trip is very long or I’ll be facing very diverse weather, in which case I pack two of some things. The best option is to dress in layers: underwear, a short- or long-sleeved T-shirt (or a thermal if it gets cold at night), lightweight shorts or pants, a long-sleeved merino layer, a hat, and a lightweight down jacket (I always bring this, unless it’s an extremely warm area). For footwear at night, I usually bring flip-flops or sandals that I can wear with socks—it’s a versatile option.
Merino wool garments help you stay comfortable for several days without a washing machine, even in summer, because they breathe very well and smell much less than synthetic fabrics.
Hygiene on the go
If you’ll be away for several days, finding a place to stay or a campground every now and then so you can take a good shower is the most comfortable option.
When camping in the wild, a damp cloth (better than wet wipes) may be enough. If you’ll be spending several days without access to a shower, at the end of the day you can fill a 4- or 5-liter collapsible bag (there are many options on the market), hang it from a branch or a rock, and take a quick shower. Bring liquid or bar soap that’s mild and works for both your hair and body.
Always bring SPF 50 sunscreen (preferably oil-free for your face) and moisturizer for the end of the day; it will help counteract the effects of sun, wind, and fatigue.
Cycling shorts are comfortable, but they can accumulate bacteria if worn for many days without washing. Keep in mind that it’s best to wear them without underwear; if you do wear underwear, the chamois loses some of its effectiveness. The alternative is to go without cycling shorts (when the terrain and elevation allow it) and wear underwear made of merino wool or microfibers with cotton in the contact area.
In my case, I prefer to always wear cycling shorts; I wash them whenever I can (in a public restroom, fountain, or water source away from rivers and lakes) and hang them to dry in the tent or on the bike. The same goes for underwear or any other clothing that needs washing.
It’s best not to shave the intimate area with a razor on long trips to reduce irritation; you can trim it with scissors if needed or leave it natural.
If you’ll be gone for several days, finding a place to stay or a campground every now and then so you can take a good shower is the most comfortable option.
When camping in the wild, a damp washcloth (better than wet wipes) may be enough. If you’re going to spend several days without access to a shower, at the end of the day
When it comes to your period, everyone is different. A menstrual cup might be the most practical option, but if you need to change while on the road and are low on water, pads or tampons might be more useful. You can always try to plan your route around your cycle and, if you’d like, schedule stops at accommodations on the most uncomfortable days—taking a couple of days off always feels good.
Bring toilet paper to dry yourself thoroughly and reduce bacteria after peeing, but don’t leave it lying around—carry a bag to store the used paper and dispose of it when you find a trash can or bin. And for anything other than pee, you can bring a lightweight shovel (there are shovels specifically designed for this!) or use a rock or stick to dig a hole, then cover it up when you’re done so you don’t leave any waste behind. Don’t forget the “leave no trace” principle.
Women are more prone to urinary or yeast infections, especially after menopause. Using intimate moisturizers and ensuring your saddle and bike are properly adjusted helps a lot in preventing them. Consult your doctor before the trip to see if they recommend bringing any emergency supplies (for example, for infections).
Repair and replacement kit
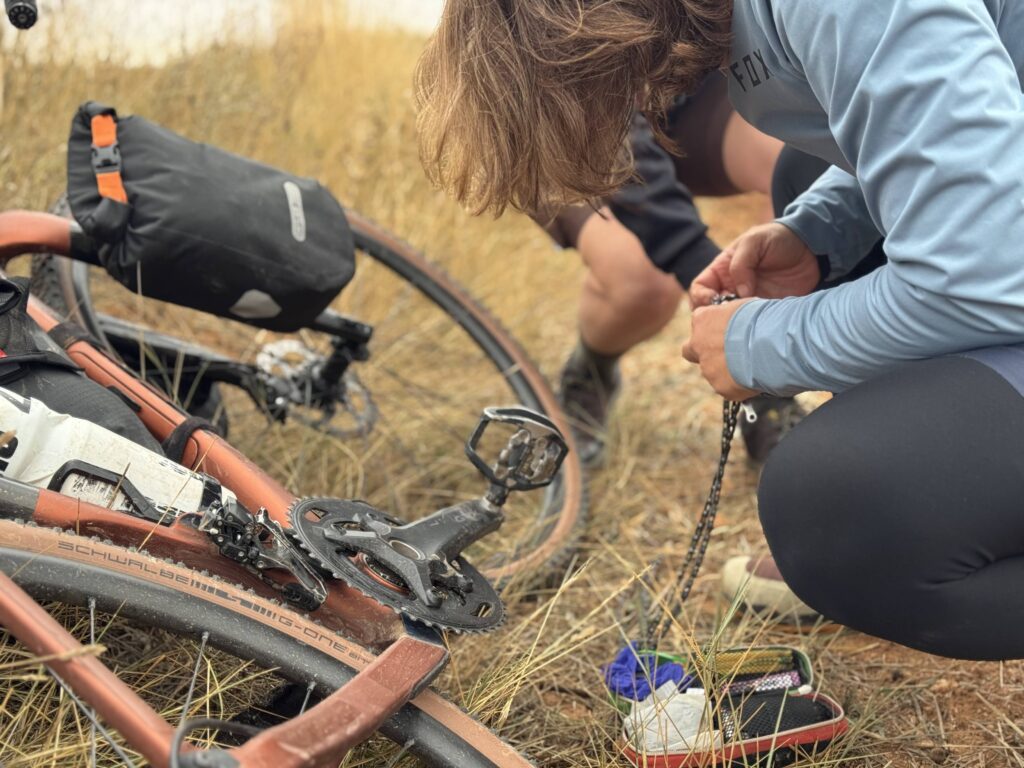
Learning a little about bike mechanics will give you confidence and help you overcome your fear of getting a flat tire or encountering a technical problem on the road. But if you do get a flat and don’t know how to change a tube, or if your chain breaks and you don’t know how to replace a link, there are plenty of videos on YouTube that show you how. However, you’ll need an internet connection and a charged phone to watch them, so it’s best to start your trip with some basic mechanical knowledge.
Don’t set out without at least a multi-tool with various wrenches, a chain breaker, pliers for quick-release links, chain lube (a small bottle is usually enough), duct tape, and zip ties.
For tires: a pump, tire levers, patches, and glue. Also, if you have tubeless tires, bring tube inserts, a tube insert tool, and some sealant.
And as for basic spare parts: inner tube(s), quick-release links, a rear derailleur hanger, brake pads, and assorted screws and bolts used on your bike (for example, a seatpost bolt).
Electronics
Obviously your phone, but also a GPS device (or a phone mount), cables, a portable charger (at least 10,000 mAh or more, or a dynamo hub if you use one), and a headlamp. A power strip with multiple USB ports is handy for charging everything at once. If you’re going to create content for social media, you’ll also want to bring a camera or video camera, a drone, extra batteries… And, if you’re traveling abroad, plug adapters.
First Aid
A first-aid kit can be a very personal thing, but the basics are: single-dose saline solution, wipes, or a small bottle of povidone-iodine, tweezers, band-aids, gauze, adhesive tape, a small bandage, antibiotic ointment, mosquito repellent spray and ointment for bites, ibuprofen, and an antihistamine. And for saddle sores, petroleum jelly and a cream for skin irritations. A little petroleum jelly before you set out will help prevent problems later. Everything in small containers or single-use doses.
Safety (especially when traveling alone)
For safety on the road, especially on highways, carry a rear light, high-visibility clothing, and a bell to alert others on paths shared with pedestrians.
Share your itinerary and approximate times with someone you trust, and bring maps or a downloaded route (GPS and/or a mobile app) in case you get lost.
You can bring a rugged emergency phone (for example, an old Nokia) with good battery life and a SIM card that works in the area. Two phones never hurt, and they add hardly any weight.
If you’re heading to very remote areas, you might even want to get a satellite communicator (for example, Garmin inReach or SPOT).
Traveling alone as a woman has many advantages—the people you meet tend to be much kinder and more generous—but obviously, it also has its risks. In areas you’re unfamiliar with, be discreet about your exact itinerary; if someone asks, you can give a general destination without detailing the route. If something doesn’t feel right, trust your instincts: it’s better to be unpleasant but safe than to please others and put yourself at risk.
Above all, don’t push yourself or force yourself to do something that might not suit you; you’re no less brave or interesting if you decide to always sleep at campgrounds, at WarmShowers (we’ll talk about this in another blog post), or with friends.
Planning
You can leave home and just go with the flow, or you can plan everything out in advance—either way, keep these details in mind:
There’s no such thing as a perfect packing list: it depends on the route, the weather, and you. Make a note of what you use and what you don’t, and adjust accordingly on each ride.
Check your bike before you leave: don’t set out on any trip, long or short, without making sure your bike is in good condition. If you don’t know anything about bike mechanics, take it to a trusted shop, explain what you’re planning to do, and ask them to inspect and tune it up.
Plan your route: even if you’re just going with the flow and don’t want to plan where to end each day, at least estimate how many miles or the approximate elevation gain you’ll cover in each stage, especially if you have a return date that can’t be changed. Don’t push yourself too hard or set goals that are hard to achieve; you’ll likely feel better as the days go by and be able to go further, but don’t get ahead of yourself. Plan to have some free time in case you arrive somewhere you love and want to stay longer, or in case the weather turns against you and stops you from moving forward.
Getting Started
If you don’t feel confident, try spending a night close to home with all your gear packed before setting off on a big trip. You can also take a weekend trip with lodging or camping, which will help you fine-tune your packing list. And bikepacking events and groups, such as the Spring Meeting or the Biketravel Fest, can help you learn and build confidence.
No one should let insecurities about hygiene or gear stop them from fulfilling a dream. The more experiences we share, the more barriers we break down.